Cutting an image
version: 1.2 (16-Jan-1999)author: John Bokma

This tutorial consist of three parts. The first part describes how to cut an image from a scanned photo. The second part shows how to add a soft shadow to such an image. I used a different image because the shadow effect with this one is more impressive. The third part shows how to create a banner (or button) with such an image.
Cutting the image
The photo (scanned at 150 dpi) in this section is of my cat Frodo in the snow.Use a rectangle to cut away the unwanted pieces. Draw a rectangle without a fill color. Select the photo and the rectangle and use Combine Shapes, Slice (cut) shapes to cut out the rectangle. Select the part you don't want and delete it. See figure 1.

Figure 1. Part of the foto with Frodo on it.

Figure 2. Right part cut away (raw).
Another method to cut away a part is by drawing a curve and use Combine Shapes, Slice (cut) shapes as described above. Remember to start and end the line outside the bounding box of the photo otherwise the photo and line can not be combined. The bounding box is what shows up when you select the image with the Selector tool. Use a thin line (0.25 pt) with a contrasting line color. The advantage of this method is that you can edit the line before the cutting.
Cut away all the undesired parts of the image. See figure 3.

Figure 3. The image after some editing.
Adding a soft shadow to an image
The photo (scanned at 150 dpi) in this section is of my cat Femke in the snow.After cutting the image make a copy. Flat fill it with dark grey (20, 20, 20). Use the freehand tool to draw a smaller version of the shadow inside the dark grey shape. Set the line color of the small shape to none and the fill color to black. Most of the time it is easier to draw the shape with the freehand tool instead of making a copy of the dark grey shape and resize it.

Figure 4. Femke and her shadow (step 1).

Figure 5. Femke and her shadow (step 2).

Figure 6. Femke and her shadow (finished).
Creating a banner
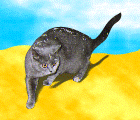
Create a background for the banner. I used a fractal fill to create the clouds and a fractal fill to create the beach. I cut the top part of the beach away with the freehand tool (see "Cutting the image").
Figure 6. Visit my Cat (step 1).
Give the banner a 3D look as described in not on line yet. I used the following values:
- top filled with black, 94% mixed transparency
- right filled with black, 84% mixed transparency
- bottom filled with black, 74% mixed transparency
- left filled with white, 50% bleach transparency

Figure 7. Visit my Cat (step 2).

Figure 8. Visit my Cat (finished).
Xarials - the Xara Tutorials